
[Web] http -> https 로 변경하기
업데이트:
0. http랑 https의 차이가 뭔가요?
HTTP는 하이퍼 텍스트 전송 프로토콜의(Hypertext Transfer Protocol)의 약자입니다. 쉽게 말하자면 서로 다른 시스템들끼리 통신을 주고받는 가장 기본적으로 사용하는 프로토콜입니다. 간단한 데이터 전송용으로 많이 사용되죠.
HTTPS는 하이퍼 텍스트 전송 프로토콜 보안(Hypertext Transfer Protocol Secure)의 약자입니다. HTTP는 암호화 되어있지 않기 때문에 데이터가 쉽게 변조, 도난될 가능성이 높았습니다. 하지만 HTTPS는 SSL(보안 소켓 계층)을 사용함으로써 보안 문제를 해결했습니다. SSL은 대칭키, 공개키 방식의 암호화를 사용하여 데이터를 보호합니다.
오늘은 http를 https로 변경하는 방법에 대해 알아볼 예정이니 이론적인 암호화 방식에 대해서는 나중에 자세히 포스팅하도록 하겠습니다.
1. SSL 인증서 발급받기.
https로 인증하려면, SSL 인증서를 발급받아야 합니다. 호스팅 서비스를 받고있는 업체를 통해 인증서를 구매하는 것이 가장 빠른 방법입니다. 저는 호스팅케이알이라는 업체를 통해 웹호스팅을 하였으므로 인증서 구매 역시 동일하게 진행하도록 하겠습니다.
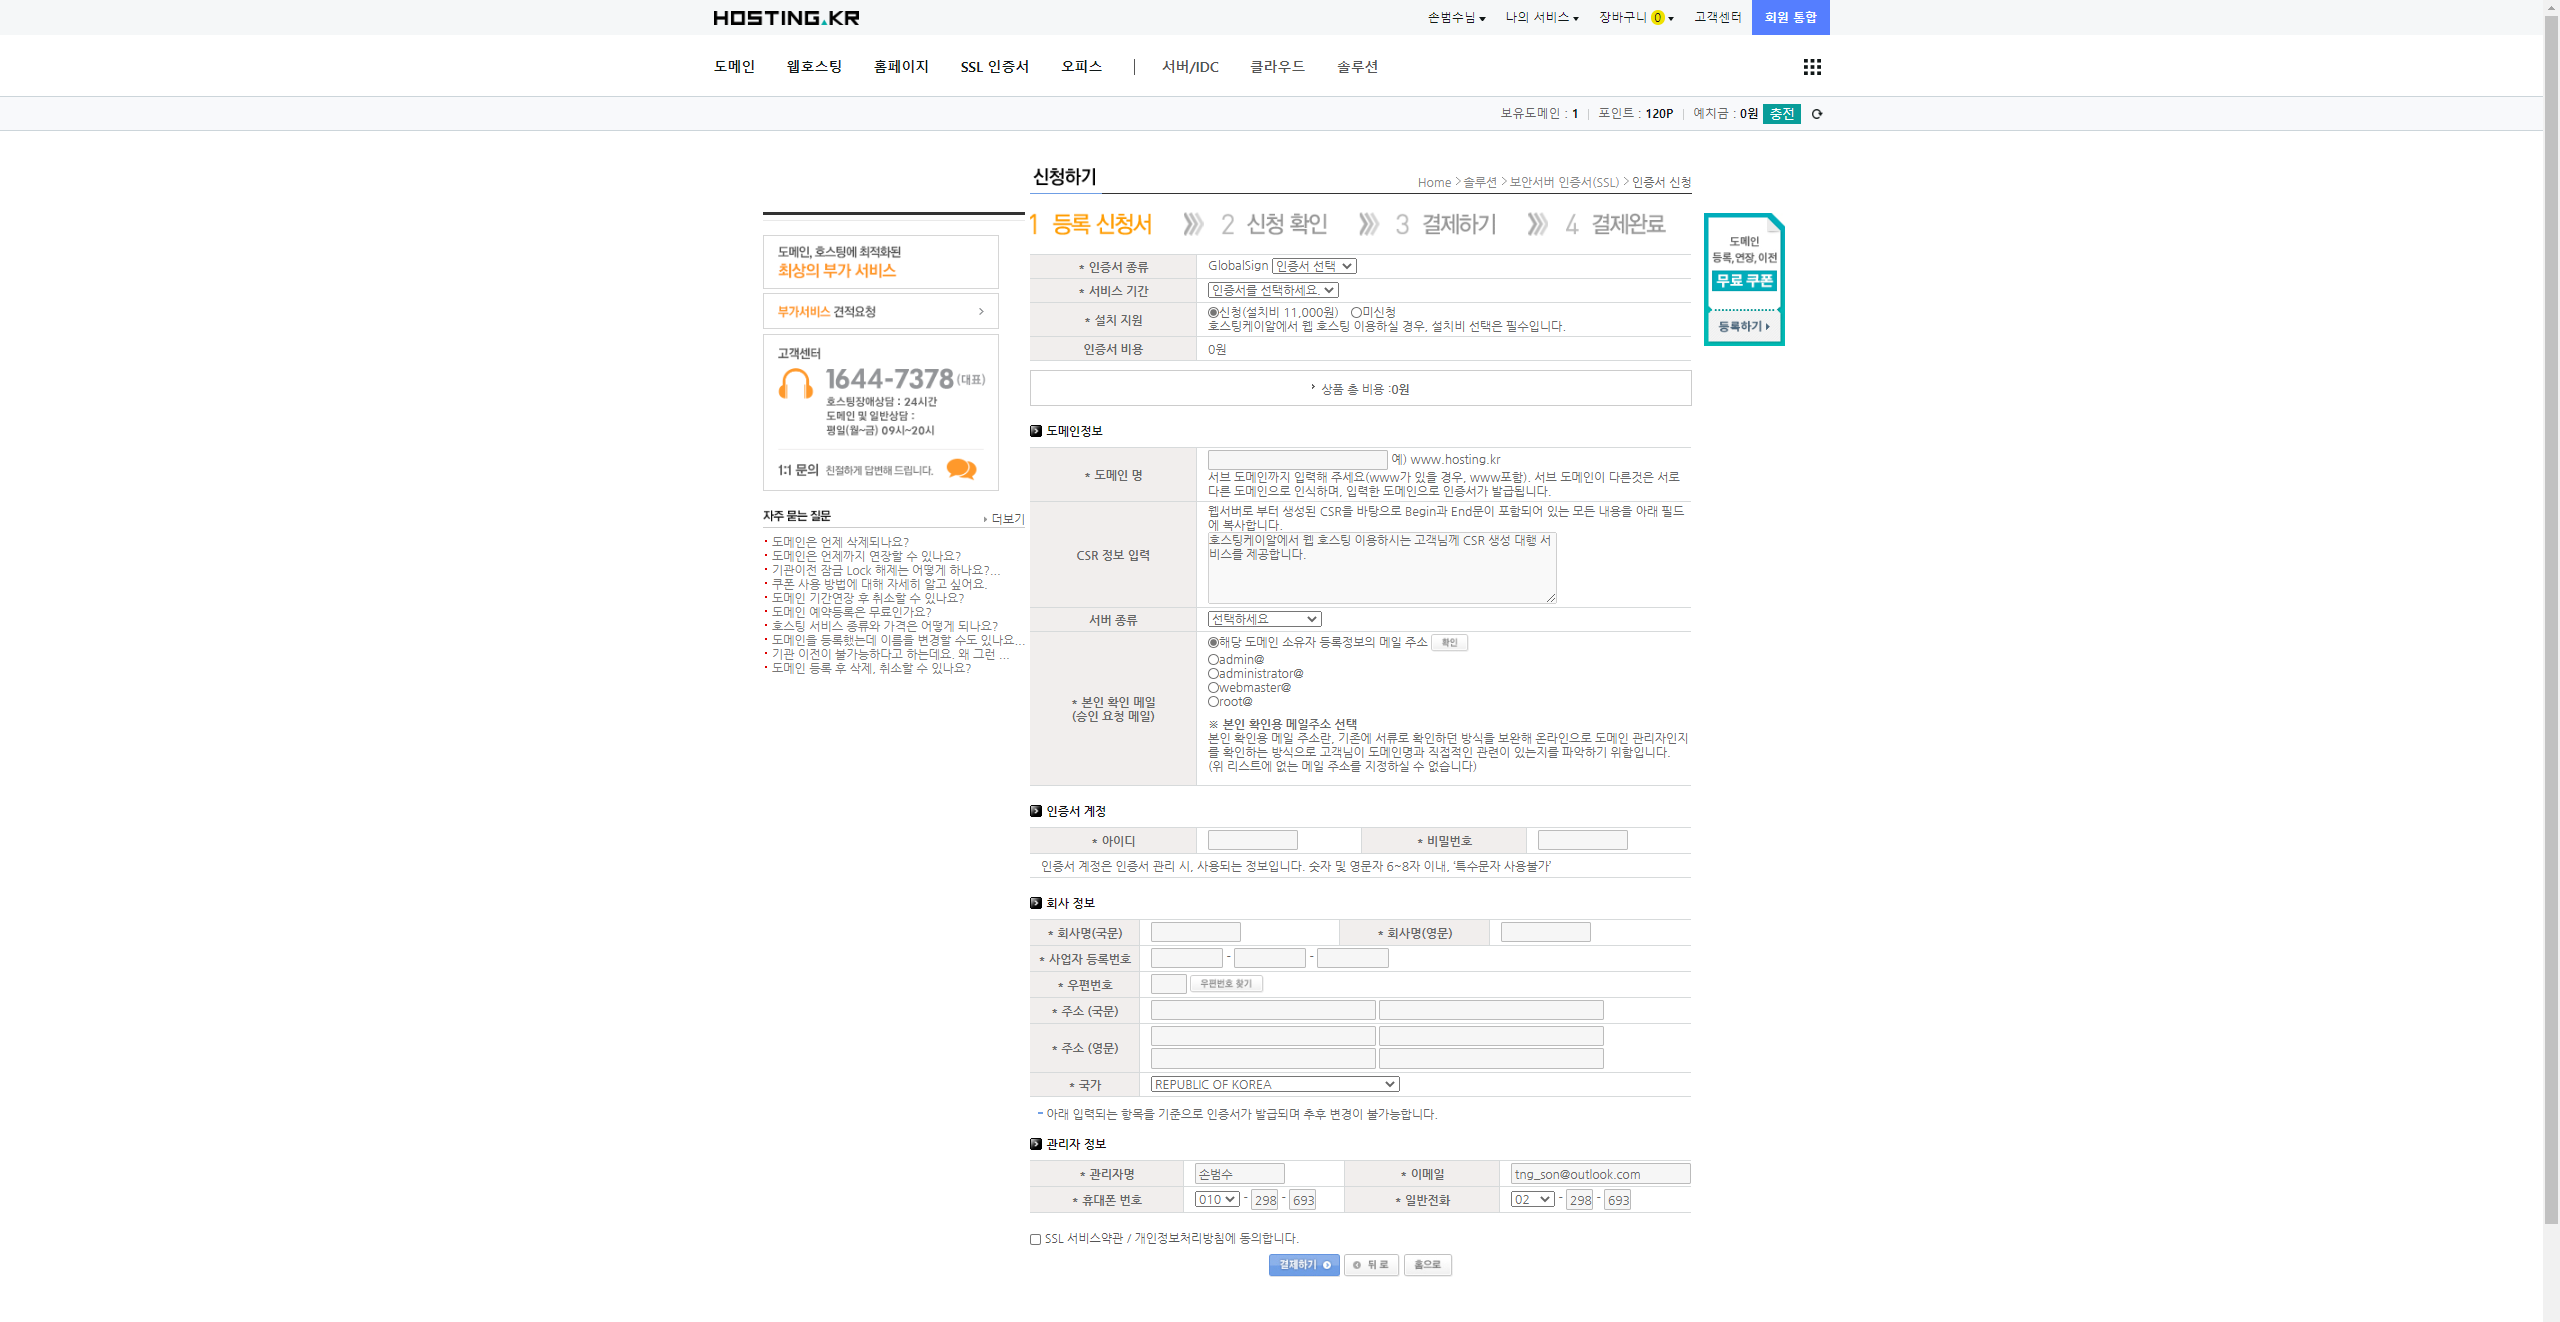
인증서 종류는 Alpha SSL과 Domain SSL이 있습니다. 두개의 차이점은 Domain SSL이 하위버전 브라우저를 사용했을 때 강제로 암호화 강도를 높인다고 합니다. 요즘은 Alpha SSL로도 충분하다고 하니 특별한 사유가 없으면, 가격이 더 저렴한 Alpha SSL을 사용해주시면 됩니다.
설치 지원을 선택하시면. 엔지니어가 알아서 인증서를 설치해줍니다. 서버종류는 본인이 사용하고있는 서버의 종류를 선택해주시면 됩니다. 저는 윈도우 기반 서버를 사용하고있기 때문에 MS IIS 7.0을 선택하였습니다.
필요한 입력항목을 다 채우신 뒤 결재하시면 1~3일 내에 설치확인 메일이 옵니다. Approve SSL Application이라는 내용으로 왔는데 첨부된 링크를 클릭하여 승인해주시면 인증서 발급 절차가 진행됩니다. 이후 인증서가 발급되면 설치 완료 메일이 발송되며, 포트번호가 추가된 https 주소를 확인할수 있습니다.
2. html 코드 수정하기.
인증서가 설치 완료되어 https로 접속이 가능하다면 모든 접속자를 https로 바꿔주는 작업을 해야합니다. 기본적으로 모든 접속은 http로 이동됩니다. 인증서를 발급받아도 주소창에 www.asdasd.com으로 접속하면 브라우저는 자동으로 http://www.asdasd.com으로 이동시키기 때문입니다.
보통 사용자들은 www.asdasd.com 형식으로 접속하지 https://www.asdasd.com로 접속하지는 않기 때문에 리디렉션 코드를 추가해줘야 합니다. 저는 리액트를 사용해서 개발했기 때문에 public / index.html 파일에 script와 meta 테그를 추가하도록 하겠습니다.
<meta https-equiv="refresh" content="0;url=https://www.tnglab.co.kr:449/#/" target="_top" />
<script>
  var url = "https://www.tnglab.co.kr:449/#/"

  window.location.replace(url)
</script>
http로 접속하여도 https로 리디렉션 시켜주는 코드입니다.
<!DOCTYPE html>
<html lang="en">
  <head>
    <meta charset="utf-8" />
    <meta name="viewport" content="width=device-width, initial-scale=1" />
    <meta name="theme-color" content="#000000" />
    <meta
      name="description"
      content="Vacuum Part , Vacuum View Port , Integral viewport , Smart View port"
    />
    <meta
      name="keywords"
      content="Vacuum Part , Vacuum View Port , Integral viewport , Smart View port"
    />
    <meta https-equiv="refresh" content="0;url=https://www.tnglab.co.kr:449/#/" target="_top" />
    <!--
      Notice the use of %PUBLIC_URL% in the tags above.
      It will be replaced with the URL of the `public` folder during the build.
      Only files inside the `public` folder can be referenced from the HTML.

      Unlike "/favicon.ico" or "favicon.ico", "%PUBLIC_URL%/favicon.ico" will
      work correctly both with client-side routing and a non-root public URL.
      Learn how to configure a non-root public URL by running `npm run build`.
    -->
    <title>TNG</title>
  </head>
  <body>
    <noscript>You need to enable JavaScript to run this app.</noscript>
    <div id="root"></div>
    <!--
      This HTML file is a template.
      If you open it directly in the browser, you will see an empty page.

      You can add webfonts, meta tags, or analytics to this file.
      The build step will place the bundled scripts into the <body> tag.

      To begin the development, run `npm start` or `yarn start`.
      To create a production bundle, use `npm run build` or `yarn build`.

    -->
    <script>
      var url = "https://www.tnglab.co.kr:449/#/"

      window.location.replace(url)
    </script>
  </body>
</html>
이때, 발급받은 포트번호를 뒤에 꼭 붙여주셔야 합니다. 포트번호가 없으면 주소 인식을 하지 못해 접속이 불가합니다.

이젠 정상적으로 https 접속이 가능합니다.
댓글남기기